7 Days to Die: Create a Sandbox Code and Use It on Your GPORTAL Server
With version 3.0 of 7 Days to Die, the server configuration was fundamentally overhauled. Many gameplay settings are no longer configured individually via the server configuration, but are instead stored in what is known as a sandbox code. This code combines all sandbox settings into a single string and can be used for both single-player worlds and dedicated servers.
What is a sandbox code?
A sandbox code contains all the important settings for your game world—such as difficulty level, loot multipliers, zombie behavior, and progression options. If you change any of these settings, a new code is automatically generated.
This makes it easy to save, share, and reuse entire game configurations on other servers.
Creating sandbox code ingame
Here’s how to create your own sandbox code:
- Launch 7 Days to Die.
- Create a new world.
- Open the Sandbox options.
- Adjust all settings to your liking.
- Then copy the Sandbox code that appears.
Any change to the options automatically generates an updated code.
Create sandbox code outside the game
You can also create a sandbox code on the following external site, for example, then copy it again and use it for your world.
Using sandbox code on a server
Once you’ve created your sandbox code, you can use it on your game server.
- First, stop the server.
- Open the server settings in your hosting panel.
- Select the section for the sandbox code or sandbox configuration.
- Paste the code you copied earlier.
- Save the changes and restart the server.
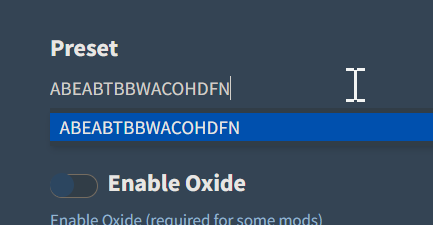
After restarting, the server will adopt all settings from the inserted sandbox code.
Apply existing settings (Pre. 3.0)
If you’ve already been playing with older server settings, we recommend noting them down first and then recreating them in the game using the sandbox options. Once you’ve created the appropriate sandbox code, you can use it on your server and continue using your preferred configuration in version 3.0.