Don’t starve together
Don’t Starve Together is a dark fantasy survival game where players are transported into a randomly generated map that is eager to kill them. Players must work together to exploit their environment to combat their ever-draining sanity, health, and hunger for as long as possible.
Basicsettings
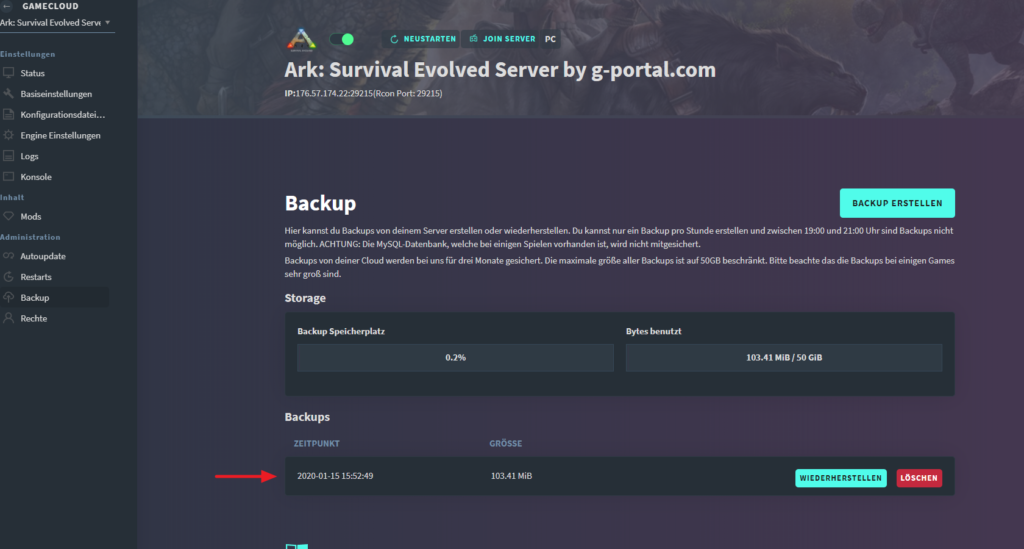
Create backup
You can create backups for your GPORTAL server if you want to. You receive free storage space for saving your game play.
Note Please note that backups are not created automatically.
How to create a backup via the web interface:
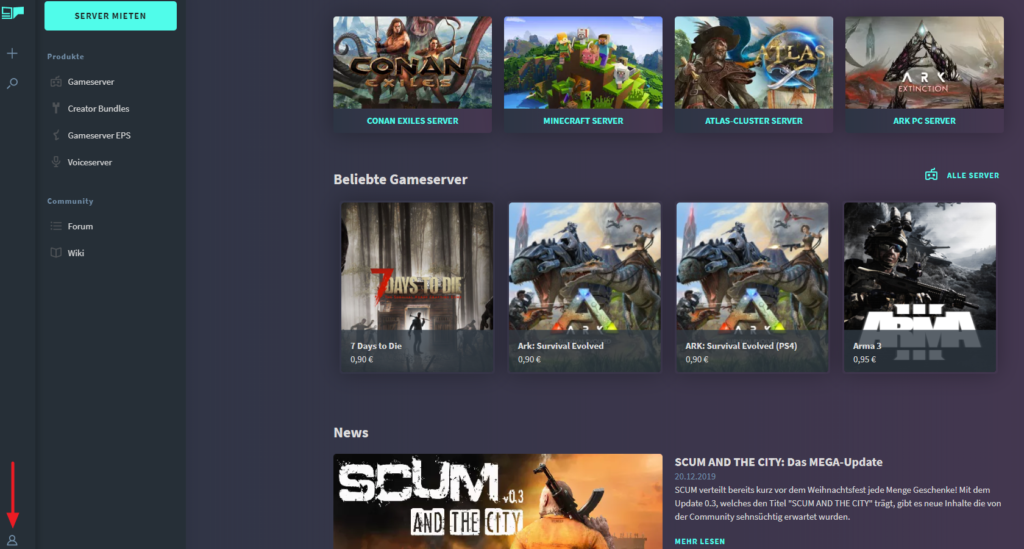
- Log on to our website
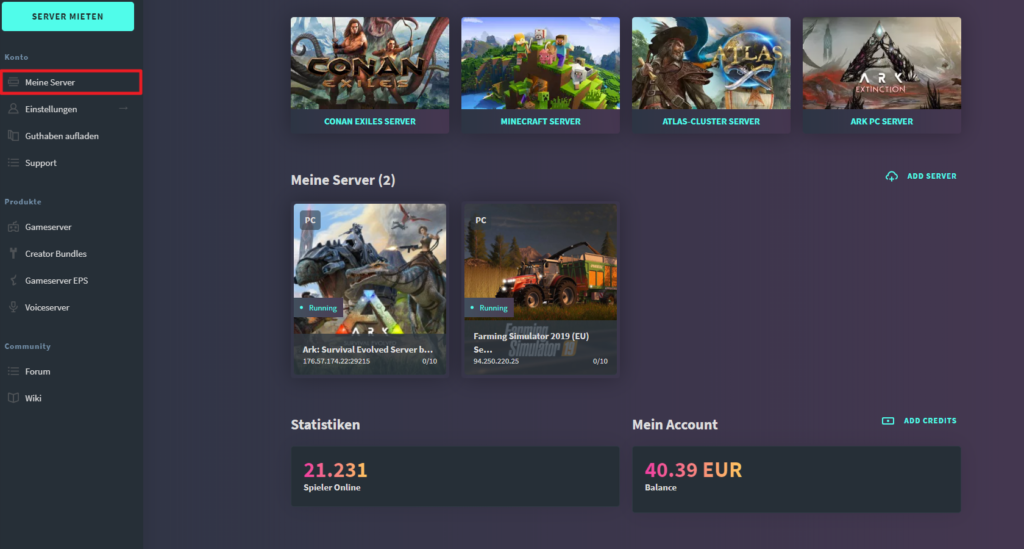
- Click on “My Servers” in the menu on the left
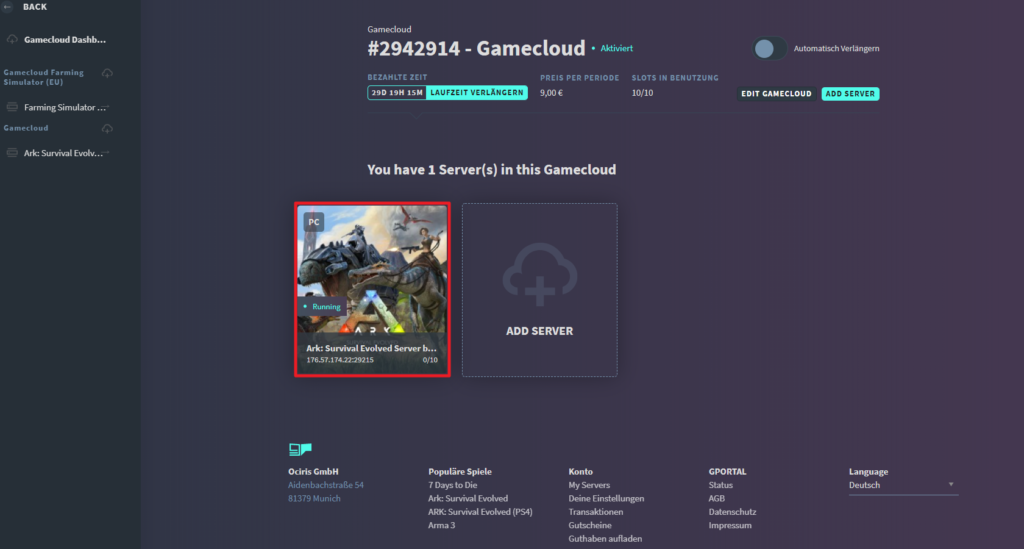
- Select the desired server
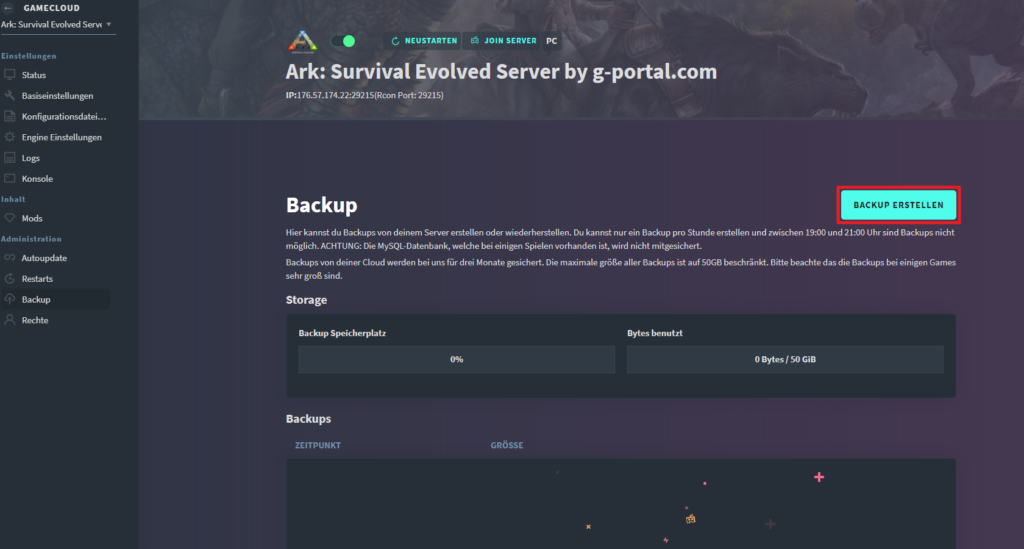
- Click on “Backup” in the “Administration” menu on the left
- Click on “Create Backup“
- The server stops for the backup
- After creating the backup, the server restarts automatically

Log in to our website Click on “My Server” in the menu on the left Select the desired server Click on “Backup” in the “Administration” menu on the left Click on “Create Backup” You see the backup in the list below

How do I activate Caves on my Don’t Starve Together-server
Start both servers once. This way you make sure that both servers have created the required configuration files. Then stop both servers again.
The master server
Navigate to the configuration files. Open the filesaves/CLUSTERNAME/Master/server.ini of the master server and copy and paste the following lines:
[SHARD]
shard_enabled = true
is_master = true
bind_ip =
name = Overworld
id = 100- Now we come to the important part. In the sub-item [SHARD], shard_enabled is set to “true”. This activates the complete master cave system.
- For your master server – this is usually the “overworld” – you leave is_master set to “true”.
- At bind_ip you enter the IP of your server without a port.
The next file we have to look at is saves/CLUSTERNAME/cluster.ini. Here you add the following lines:
[SHARD]
shard_enabled=true
is_master=true
master_ip=
master_port=
shard_name=Upperworld
cluster_key=- We set some points here again for security, so as explained above: shard_enabled to “true” and for the master server is_master also to “true”.
- At master_ip you enter the IP – again without port – of the master. For master_port you enter the game server port +3. So if your port is 31800, you enter 31803. In shard_name, you can enter a name.
- The cluster_key is also important. This must be identical on both servers. Here you can use a sequence of numbers and letters (e.g. asd8asd7a9ds).
- Save your changes with the “Save” button.
The cave server
First we open the file: saves/CLUSTERNAME/Master/server.ini. Here we add the following lines:
[SHARD]
shard_enabled = true
is_master = false
bind_ip =
master_ip =
name = Cave
id = 200- Here you can see that the cave server has the is_master setting set to “false”. This is how it has to be! We have set the ID to 200, this just has to be different from the master.
- At bind_ip you enter the IP of the cave server and at master_ip the IP of your master server. This is important so that the servers can find each other.
- Save your changes with the “Save” button.
Now open cluster.ini on the cave server. Insert this block here:
[SHARD]
shard_enabled=true
is_master=false
master_ip=
master_port=
shard_name=Cave
cluster_key=- For master_ip, please enter the IP of the master server and for master_port, the gameport of the master +3 (i.e. in our example 31800 -> you enter 31803).
- Set the same cluster key as for the master server and save the changes.
Prepare the world for the cave
Now comes the last step. We generate the caves on the cave server. To do this, open the worldgenerateoverride.lua on your cave server, delete the existing content and enter these lines:
return {
    override_enabled = true,
    settings_preset = "DST_CAVE",
    worldgen_preset = "DST_CAVE",
}
Save the changes.
Connect to the master server and ingame try to locate some rocks that you can mine, so you will need a pickaxe, once this is done, it will open a small hole that you can use and you will enter your cave server.

Advanced Serversettings
How do I add mods to my server?
In order for you to add a mod to your server, you need to follow a few minor steps.
Find out WorkshopID
The first thing you need is the WorkshopID of the respective mod. You can easily find this out directly via Steam.
- Open the community hub for Don’t Starve Together
- Now search for the mod you would like to use
- For this description here we choose the Minimap HUD mod, which you can find here:
https://steamcommunity.com/sharedfiles/filedetails/?id=345692228 - In the link you can also find the ID, namely at the end the sequence of numbers 345692228
-> For another mod this would be different
-> Note this ID
Download mod
You will now need the ID you just wrote down to download the mod and start it when you start the game or server as well.
- First of all, you need to look in the file folder for Don’t Starve Together for the following path or file:
/dontstarve/mods/dedicated_server_mods_setup.lua - Open this file with an editor and you will see a lot of text
- You should see the following/similar text in the file:
--There are two functions that will install mods, ServerModSetup and ServerModCollectionSetup. Put the calls to the functions in this file and they will be executed on boot.

--ServerModSetup takes a string of a specific mod's Workshop id. It will download and install the mod to your mod directory on boot.
	--The Workshop id can be found at the end of the url to the mod's Workshop page.
	--Example: http://steamcommunity.com/sharedfiles/filedetails/?id=350811795
	--ServerModSetup("350811795")

--ServerModCollectionSetup takes a string of a specific mod's Workshop id. It will download all the mods in the collection and install them to the mod directory on boot.
	--The Workshop id can be found at the end of the url to the collection's Workshop page.
	--Example: http://steamcommunity.com/sharedfiles/filedetails/?id=379114180
--ServerModCollectionSetup("379114180")- Here you have to add the following line at the end
ServerModSetup("WorkshopID")- At WorkshopID you type in the ID of your mod, in our case it would be 345692228 which makes the whole thing look like this:
ServerModSetup("345692228")- If you now start Don’t Starve, the corresponding mod (or several mods) will be downloaded
- For this your system will automatically create subfolders for the mods under the following path, which carry the respective ID of the mod:
/dontstarve/mods/
Activate mod
Now that you have downloaded the mod and created corresponding subfolders on your system, you just need to activate the mods.
- To do this, open the following file:
/dontstarve/mods/modsettings.lua - Here we will now also insert a new line
- You should be able to see the following/similar text in the file:
-- Use the "ForceEnableMod" function when developing a mod. This will cause the
-- game to load the mod every time no matter what, saving you the trouble of
-- re-enabling it from the main menu.
--
-- Note! You shout NOT do this for normal mod loading. Please use the Mods menu
-- from the main screen instead.

-- ForceEnableMod("kioskmode_dst")

ForceEnableMod("workshop-380079744")

-- Use "EnableModDebugPrint()" to show extra information during startup.

--EnableModDebugPrint()- Now add the following line below:
ForceEnableMod("workshop-WorkshopID")- Replace WorkshopID again with the ID of the mod
-> Then it should look like this in our case:
ForceEnableMod("workshop-345692228")When you start the game now, you should be able to use the mod accordingly. If you want to use multiple mods, you need to add each of the mods in the same way, only with customized ID.
General questions / FAQ
How do I create a cluster token?
In order for your Don’t Starve Together server to work, you need a cluster token, which you can create on the developer Klei’s website.
Proceed as follows:
- Click on the link in the article to go to the developer’s website.
- Log in with your account or create one
- Then create the cluster tokens by following the steps shown on the website
- Make a note of these cluster tokens
- Now log in to your GPORTAL account and select “My Servers” on the left side
- Select your Don’t Starve Together server
- Click on “Basic Settings” on the left side and you will see “Cluster Token” at the top of the page
- Enter your Cluster Token and save the changes (note that your server must be stopped to make changes)
How can I manually join my server?
Proceed as follows:
- Start the game
- Open the ingame console, by pressing ~.
- Then enter the following command in the textbox:
c_connect(“ip, port, password”) - Replace the values in the brackets with the IP, port and password of your server.
Have fun playing!